
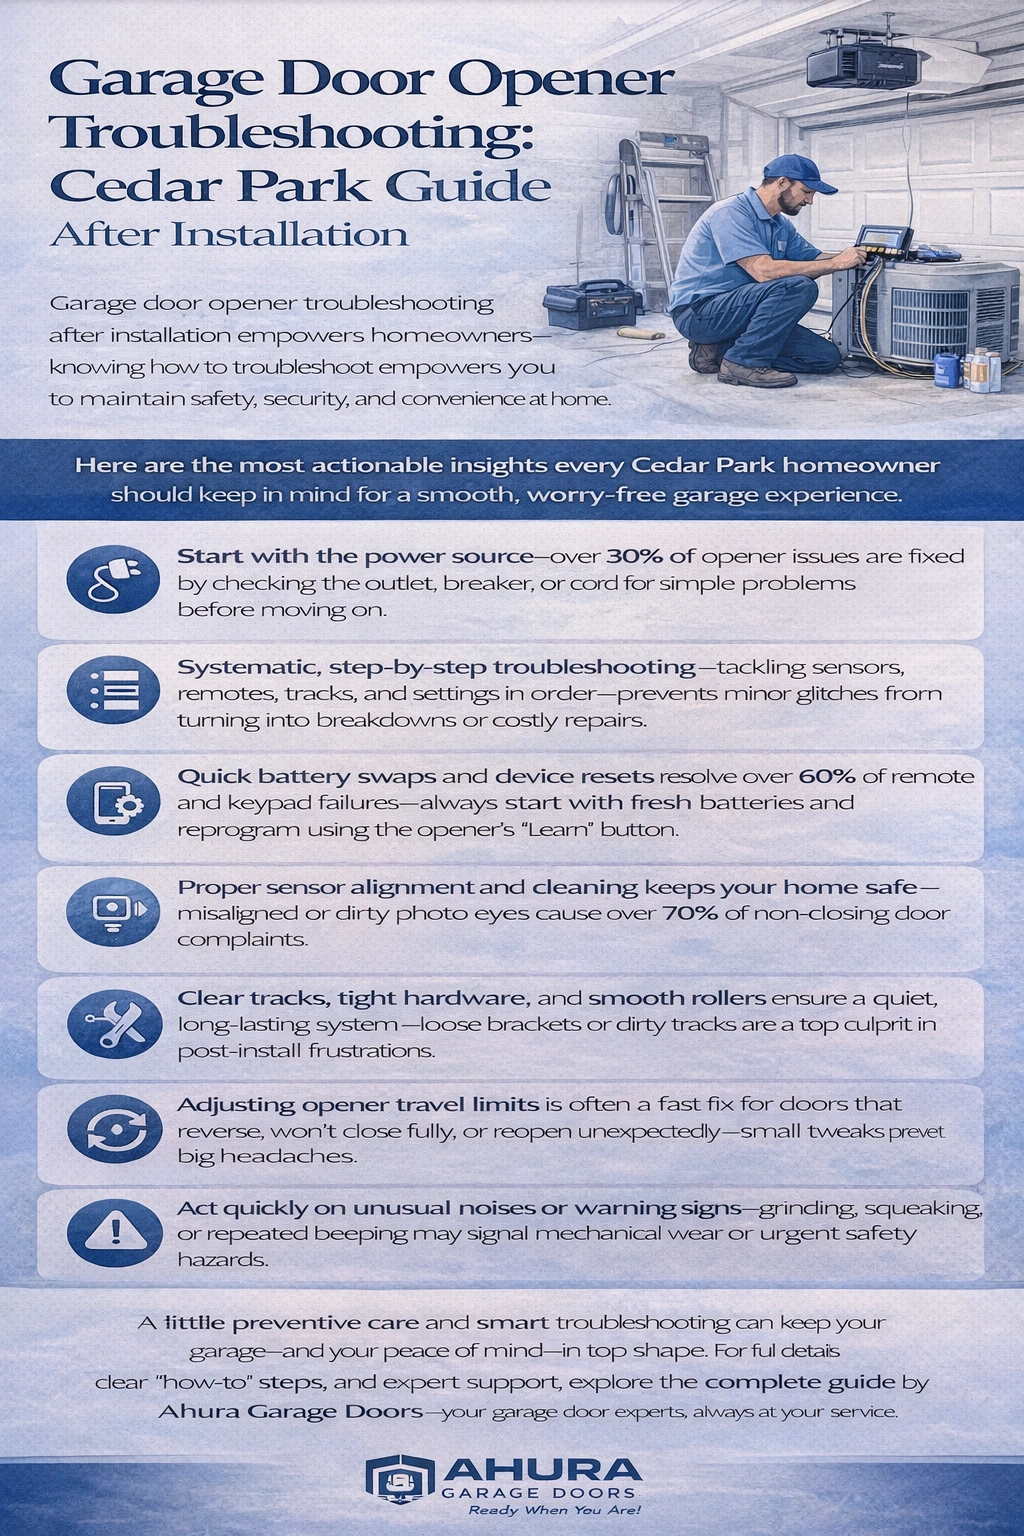
Garage door opener troubleshooting after installation empowers homeowners—knowing how to troubleshoot empowers you to maintain safety, security, and convenience at home. Here are the most actionable insights every Cedar Park homeowner should keep in mind for a smooth, worry-free garage door experience.
- Start with the power source—over 30% of opener issues are fixed by checking the outlet, breaker, or cord for simple problems before moving on.
- Systematic, step-by-step troubleshooting—tackling sensors, remotes, tracks, and settings in order—prevents minor glitches from turning into breakdowns or costly repairs.
- Quick battery swaps and device resets resolve over 60% of remote and keypad failures—always start with fresh batteries and reprogram using the opener’s “Learn” button.
- Proper sensor alignment and cleaning keeps your home safe—misaligned or dirty photo eyes cause over 70% of non-closing door complaints.
- Clear tracks, tight hardware, and smooth rollers ensure a quiet, long-lasting system—loose brackets or dirty tracks are a top culprit in post-install frustrations.
- Adjusting opener travel limits is often a fast fix for doors that reverse, won’t close fully, or reopen unexpectedly—small tweaks prevent big headaches.
- Act quickly on unusual noises or warning signs—grinding, squeaking, or repeated beeping may signal mechanical wear or urgent safety hazards.
- Know when to call the pros—recurring faults, visible electrical damage, or spring issues demand expert help to avoid injury and guarantee reliable operation.
A little preventive care and smart troubleshooting can keep your garage—and your peace of mind—in top shape. For full details, clear “how-to” steps, and expert support, explore the complete guide by Ahura Garage Doors—your garage door experts, always at your service.
Introduction
You press your garage remote, but nothing happens—and suddenly, you’re stuck outside during a Texas thunderstorm, wondering what went wrong just hours after installation.
It’s a headache every Cedar Park homeowner dreads, but here’s the reality: more than 30% of new garage door opener calls are solved with quick, at-home troubleshooting—no tools or technical know-how required.
A working garage door isn’t just about convenience; it’s the entry point for your family, a layer of security, and key to daily peace of mind. Yet even the best openers can hiccup after install, leaving you guessing: is it a power blip, a remote problem, or something trickier behind the scenes?
Most post-installation issues come down to:
- Simple power or wiring checks
- Remote and keypad resets
- Cleaning and aligning safety sensors
- Checking tracks, rollers, and door balance
- Fine-tuning settings for smooth operation
- Solving annoying noises or Wi-Fi quirks
Knowing how to troubleshoot these essentials can save time, sidestep costly repairs, and protect your home’s security—especially when every minute matters.
At Ahura Garage Doors, we understand how stressful a stubborn opener can be, especially when your whole routine depends on it. That’s why our experts are always just a call away, or ready with clear, step-by-step guidance so you can fix the most common issues confidently—without waiting around or worrying about surprise expenses.
Ready to feel empowered and keep your garage door running smoothly from day one? Let’s walk through the smart, safe troubleshooting tactics every Cedar Park homeowner should know—starting with the essentials that keep your opener moving, secure, and reliable.
Understanding Post-Installation Garage Door Opener Issues
Troubleshooting your garage door opener after installation isn’t just smart—it’s essential for safety, security, and everyday convenience.
A quick fix can save hours of frustration, prevent costly mistakes, and keep your family protected, all without waiting for a service call.
“An effective troubleshoot is more than solving a glitch—it’s taking control of your home’s reliability.”
Why Troubleshooting Matters for Homeowners
Knowing the basics can help you:
- Restore access to your garage immediately when the door gets stuck or unresponsive
- Prevent small issues from spiraling into pricey repairs by catching them early
- Feel confident handling simple adjustments, giving you true peace of mind after installation
Imagine it’s a stormy night in Cedar Park—your remote won’t open the garage. With the right steps, you can often get your door moving in minutes.
Most Common Post-Install Problems
These are the issues our experts at Ahura Garage Doors see most often in Cedar Park homes:
- Power supply failures: Openers not powering on or tripping circuit breakers
- Remote or keypad issues: Weak range, unresponsive controls, or forgotten security codes
- Sensor alignment problems: Safety beams blocked, misaligned, or with flashing LEDs
- Track, roller, or hardware faults: Noisy, uneven, or stuck movements due to dirt or loose parts
- Incorrect opener limits: Doors reversing or refusing to shut fully
- Unusual noises: Grinding, squeaking, or persistent beeping
- Wi-Fi and smart connectivity errors: Lost app connections or intermittent wireless control
The Value of Systematic, Safe Troubleshooting
Approaching troubleshooting step-by-step provides clarity and keeps things simple:
- Always start with the basics—check power and remote batteries first.
- Work down the list: test sensors, clear tracks, and listen for odd noises.
- Use manufacturer manuals to guide you, and never bypass safety features like sensors.
“Systematic troubleshooting transforms a mystery into a manageable checklist—safety first, always.”
Ahura Garage Doors is ready with guidance and support, but empowering yourself can solve 80% of common issues right at home.
Choosing a clear, calm method protects your property and puts you in the driver’s seat if anything goes wrong—and if it’s beyond DIY, our team is always at your service.
A strong troubleshooting mindset means fewer surprises and more confidence—remember, most garage opener frustrations have a simple fix when you know where to look.
Power Supply and Initial System Checks for Garage Door Opener Troubleshooting
Testing the Power Source
A garage door opener is only as reliable as its power source—so this is always step one.
Start by confirming the opener is plugged in securely to the ceiling outlet.
Test the outlet with a lamp or phone charger:
- If the device works, your outlet delivers proper power.
- If not, check your home’s circuit breaker to see if it’s tripped—this is a top cause of surprise outages.
Inspect the power cord:
- Look for visible damage—cracked insulation or exposed wires are strong warning signs.
- A damaged cord means it’s time to stop and call a pro to avoid electrical hazards.
In Cedar Park, over 30% of opener calls are resolved with just a simple outlet or breaker check.
“Always start troubleshooting with the basics—sometimes a tripped breaker is all that stands between you and a working garage door.”
Performing a Power Reset
If your power supply checks out but the opener won’t respond, a power reset often gives electronics a fresh start.
Here’s how:
- Unplug the unit from the outlet, or switch off your dedicated garage circuit breaker.
- Wait 15 seconds—long enough for the system to clear memory.
- Plug back in.
Many issues, like frozen control boards or unresponsive remotes, are resolved instantly with this step:
- Remote won’t pair? Try a reset before reprogramming.
- Opener stuck mid-cycle? Resetting clears “stuck” logic.
This method works for the vast majority of modern openers installed since 2015—and it’s totally safe for at-home use when you follow these steps.
Picture this moment: You flip the breaker, count to 15, and the next time you press the wall button—success.
“Sometimes the fix is as easy as unplug, count to fifteen, and plug back in.”
Recognizing When Power Issues Indicate Professional Help
Some power issues signal deeper, unsafe trouble. Call a professional if you notice:
- Burning smells or sparking around the opener
- Repeatedly tripped circuit breaker
- Power cord damage or melted plastic
Never attempt “DIY” fixes if wires are exposed or the circuit won’t reset. An estimated 1 in 10 electrical garage door failures involves a risk of shock or fire if handled improperly.
“A safe home is a happy home—don’t take chances with garage door wiring or persistent electrical faults.”
Catching small power problems quickly can keep your garage door opener running smoothly for years. For anything more than a simple reset or obvious breaker issue, call your local experts—safety and peace of mind are our top priorities.
Remote Control and Keypad Troubleshooting
Common Remote and Keypad Problems
Few things are more frustrating than pressing your garage opener remote or keypad—and getting no response.
It’s a common scenario in Cedar Park homes: you pull into your driveway, press the button, and nothing happens.
Look for these key symptoms:
- Unresponsive remotes: No lights or sounds when pressing buttons
- Limited range: Remote only works right next to the garage
- Keypad failures: Keypad lights up but doesn’t trigger the door
- Wall button works, but remote doesn’t: This points to remote-specific issues, not a wiring problem
Wall control issues typically affect everything, while remote or keypad problems are usually isolated.
“A working wall button often means your remote just needs some quick attention—no need to panic or pay for a big repair.”
Reprogramming and Resolving Interference
Ready to reprogram your devices? Here’s how most openers work:
- Press and hold the “Learn” button on your opener (usually behind a light cover) until the light blinks.
- Within 30 seconds, press your remote button or enter your keypad code.
- Wait for the opener light to blink or click—this means programming is complete.
Still stuck? Be on the lookout for:
- Lock mode on wall consoles (sometimes activated by accident—look for a padlock icon)
- Electronic interference: Nearby LED bulbs, Wi-Fi routers, or neighbor remotes can disrupt your signal
- Reset your opener codes after a move or security concern, following your manufacturer’s instructions
“Some modern LED bulbs can cut your remote’s range in half—try swapping bulbs if your signal seems weak.”
Battery, Range, and Hardware Solutions
Dead or weak batteries are behind a surprising 60% of remote issues after installation.
Here’s how to troubleshoot quickly:
- Replace batteries in all remotes and keypads every 12 months—use fresh, high-quality brands
- Test remote range by gradually stepping away from the door; range is typically 50-100 feet in open space
- Check for physical damage: Cracked remote cases, corroded terminals, or sticky buttons call for replacement
- Remove obstructions: Clear away metal shelving or storage bins near the opener’s antenna
“Picture this: You’re standing five feet from the garage, waving the remote, but a simple battery swap could bring your opener back to life instantly.”
Homeowners who tackle remote and keypad problems systematically—starting with batteries, reprogramming, and checking for interference—solve most issues in minutes. Remember, a little DIY troubleshooting brings instant results and keeps your garage door opener running smoothly, the Ahura Garage Doors way: Reliable, approachable, and always at your service.
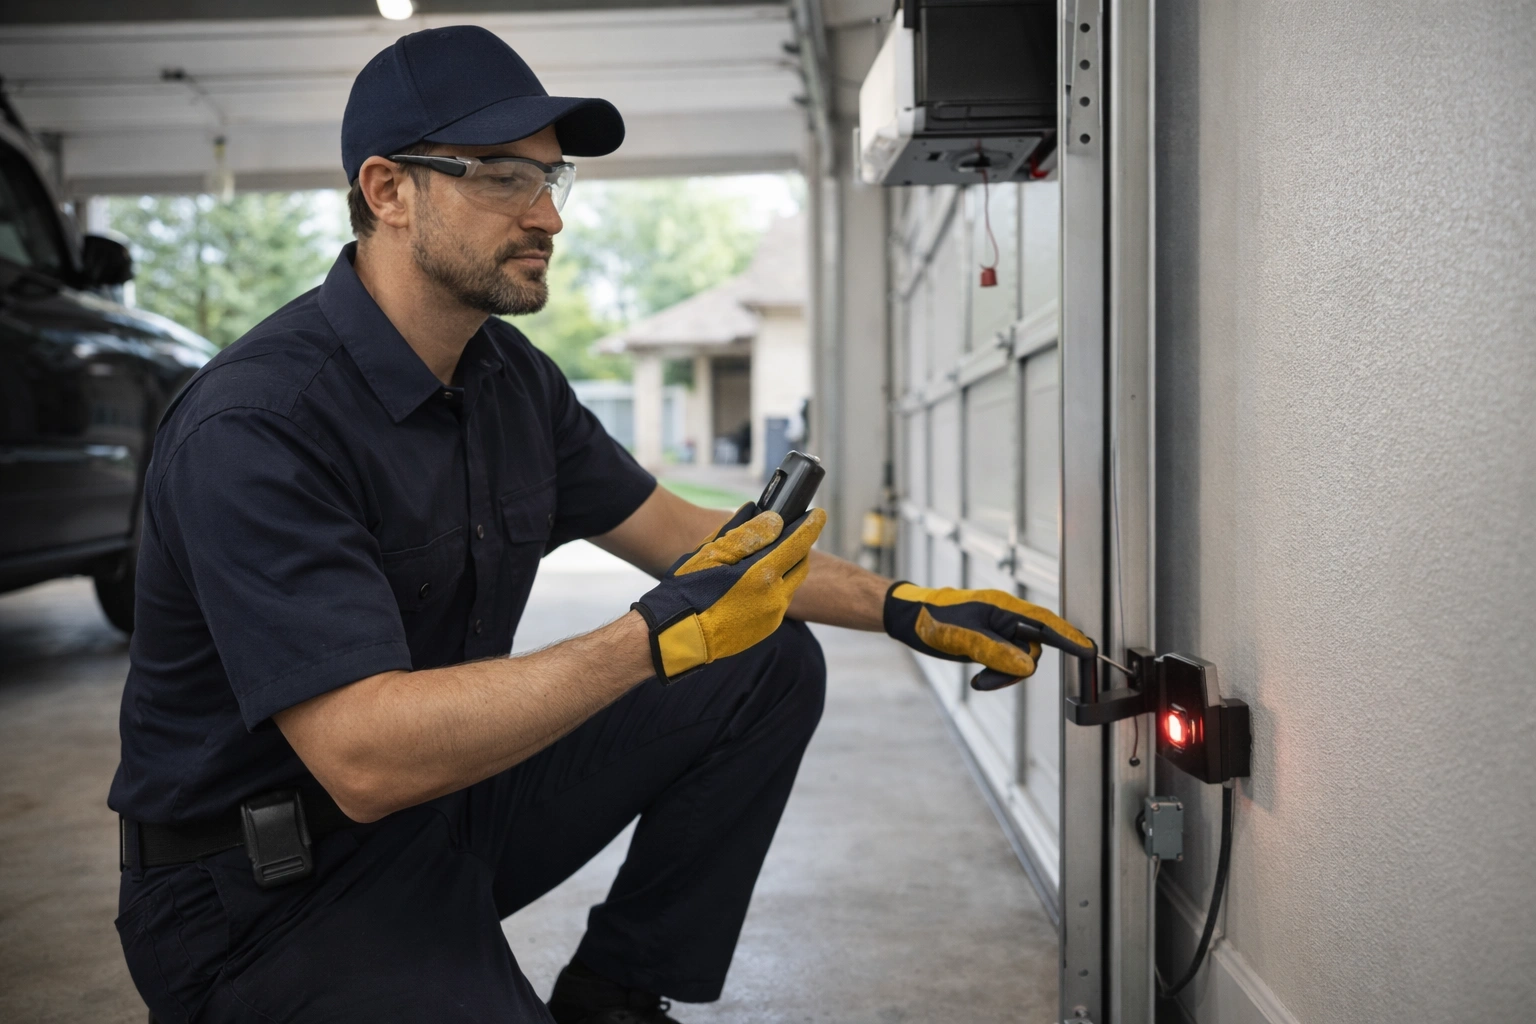
Sensor Alignment, Safety Features, and Diagnostic Indicators
Understanding Safety Sensors
Garage door openers rely on infrared safety sensors—often called photo eyes—mounted near the base of the tracks, typically no higher than 6 inches from the ground.
These beams detect obstacles like pets, kids, or objects, automatically reversing the door if the path is blocked.
It’s not just a convenience—properly aligned sensors are a must for safety and to meet legal standards in the U.S.
Picture this: Your garage door stops mid-close and reverses every time, with nothing seemingly in its way. In 70% of cases, this means misaligned sensors.
Cleaning and Aligning Photo Eyes
Dust, spider webs, or leaves can interfere with the sensor beam, halting door operation.
To clean:
- Use a soft, dry cloth to gently wipe each sensor lens.
- Avoid abrasive materials that might scratch and disrupt the beam.
Alignment matters just as much:
- Both sensors should point directly at each other and be mounted at the same height.
- Sensor indicator lights should shine steadily—flickering or off lights are a sign of trouble.
- Adjust the sensor brackets gently until both LEDs are solid.
A quick test: Wave a broom handle between the photo eyes. The door should reverse instantly—if not, alignment or cleanliness is likely at fault.
Troubleshooting Sensor Wiring and Fault Signals
Faulty wiring or loose connections are another common culprit, especially after installation or hardware bumps.
- Visually inspect sensor wires for cuts, staples, or frayed insulation.
- Tighten any loose sensor connections at the opener or wall.
If your garage door won’t budge and both sensor lights are off or blinking:
- Hold down the wall-mounted open/close button. This typically overrides the safety sensors in emergencies (but never bypass sensors as a permanent fix).
Pay close attention to what the door is telling you:
- Flashing lights or beeping patterns signal specific issues—ten flashes might mean sensor misalignment, three for wire faults. Your opener’s manual will have a chart for these codes.
- Quick fact: Over 60% of recurring door malfunctions after installation trace to overlooked sensor alignment or wiring.
A well-aligned and clean sensor setup means safer, smoother operation—every day. If you ever see blinking sensor lights or repeated reverse cycles, checking alignment and wiring first can save service calls and ensure your family’s safety. Proper troubleshooting puts you in control and gives your opener its longest, safest life.
Track, Roller, and Door Balance Assessments
Inspecting Tracks and Rollers
A smooth-running garage door starts with clean, clear tracks and reliable rollers—issues here are one of the top reasons an opener struggles after installation.
Start by looking for debris or buildup in the tracks:
- Use a damp cloth or soft brush to remove dust, dirt, or cobwebs.
- For stuck-on residue, a household degreaser usually works.
Check all brackets and hardware with a quick visual sweep:
- Tighten loose bolts with a wrench; even a slightly loose bracket can throw the whole system off.
- Worn or chipped rollers make a screech or grind—plastic wheels may show cracks, while metal ones might look misshapen.
If you see flat spots, major rust, or missing ball bearings, it’s time for a replacement.
Picture this: You try to open the garage door, but hear a nerve-jangling squeal and feel a stubborn tug. That almost always means your rollers or tracks need attention—fast.
“Smooth tracks today mean a quieter, safer door tomorrow.”
—
Testing and Adjusting Door Balance
A well-balanced door protects both your opener and your family.
To check balance safely:
- Disconnect the opener trolley: Pull the emergency release cord (usually red).
- Lift the door halfway and let go gently—it should stay in place.
If the door slams shut or flies open, your springs may be under or over-tensioned.
Signs of proper spring tension:
- The door stays level and moves up/down smoothly.
- Operating the door manually shouldn’t feel unusually heavy or light.
Did you know? Even slight balance issues can shorten opener life by up to 30%, leading to early, costly repairs.
—
Recognizing When Springs or Hardware Need Professional Service
Garage door springs run under high tension—adjusting them is a job for the pros.
Call an expert if:
- The door feels extremely heavy, crooked, or unsafe.
- You notice severe wear, a visible gap in the spring, or a loud snap.
Professional tune-ups usually cost $150–$350 in Cedar Park, TX, but they’re far cheaper than ER bills or full system replacements.
“Never risk your safety—when in doubt, call Ahura Garage Doors and let our experts handle the heavy lifting.”
When you keep tracks clear, rollers smooth, and the door balanced, you not only prevent serious repairs, but also enjoy a quieter, safer, and much longer-lasting garage door system.
Adjusting Opener Limits, Settings, and System Resets
Setting Travel Limits and Force Adjustments
Travel limits tell your garage door opener how far to open and close the door.
If these aren’t set correctly, you’ll spot clear warning signs:
- Door reverses before closing fully
- Door doesn’t shut all the way or reopens unexpectedly
To adjust:
- Locate the limit adjustment screws or buttons—usually found on the opener’s main unit.
- Use a screwdriver or press buttons per your owner’s manual:
- “Up” sets how far the door opens.
- “Down” sets how far it closes.
- Make small, quarter-turn adjustments, test the door after each change, and repeat if needed.
A door that only opens halfway or won’t seal is almost always an “easy fix” with limit tuning.
Performing Full System Resets and Reprogramming
For persistent issues like intermittent operation or confused remotes, a full system reset can restore order fast.
Here’s how most brands reset:
- Unplug the opener or turn off power at the breaker for 15 seconds.
- Restore power.
- Use the main “learn” or “program” button on your opener, usually holding it until the indicator light blinks.
- Reprogram remotes and keypads, following your user manual’s step-by-step for each device.
Pro tip: Only reset if manual adjustments don’t fix the issue—resets wipe memory, so remotes must be re-added!
A reset can solve mysterious malfunctions, especially after power surges or installation.
Consulting Manuals and Gathering Model-Specific Data
Your garage door opener’s manual is pure troubleshooting gold—keep it handy.
When in doubt, look up:
- Wire diagrams and control locations
- Specific limit/force setting sequences
- “Learn” button details by model
Ahura Garage Doors techs use a growing database of manufacturer manuals, settings updates, and model quirks—cutting diagnosis time and mistakes.
Tip: Many manuals are now online; search “[Your Brand] opener manual” for direct access.
“Knowing your opener’s exact model unlocks the solution faster than guesswork ever could.”
A perfect adjustment means a door that closes silently, feels safe, and doesn’t need “babysitting.” If you’re stuck, reviewing your manual or calling in the Ahura Garage Doors team can resolve quirks and save you from frustration. A well-tuned opener is the real finish line for any installation.
Addressing Unusual Noises and Mechanical Faults
Diagnosing Opener and Door Noises
Strange sounds after a new garage door opener install can be your system’s way of telling you something’s off.
Normal operation produces a smooth, steady hum or soft click—but sharp grinding, high-pitched squeaking, or constant beeping mean it’s time to investigate.
Picture this: You hit the remote, and instead of a quiet rise, your door shrieks or rattles—that isn’t normal.
If you hear:
- Grinding: Possible gear wear or chain drive issues.
- Squeaking: Often dry rollers or track surfaces.
- Beeping: Fault alerts, battery warnings, or sensor/blockage issues.
The quick fix? Apply garage-specific silicone spray to tracks and rollers, wiping away dust and debris first. Avoid grease—that attracts dirt and makes things worse long-term.
“If a garage door opener sounds like it’s begging for help, it usually is—act fast.”
—
Inspecting Drive Chain, Gears, and Motor
Unusual noise is a classic hint of mechanical wear. Don’t ignore the obvious—pop the cover and give your opener’s chain, gears, and motor area a close eye.
Check for:
- Loose or sagging drive chains
- Chipped, worn, or rusted gears
- Motor straining, pulsing, or failing to engage
A chain that slaps or sags noticeably is a red flag and should be tightened per your model’s specs. If the door moves jerkily or the motor hums but nothing happens, you may have a disengaged trolley—or worse, internal gear damage.
Memorable visual: “A well-tuned opener chain sits snug, moves smooth, and never clatters on the rail.”
—
Warning Signs of Imminent Breakdown
If the noises grow louder, more frequent, or suddenly violent—time’s up for DIY.
Shut off power immediately if you notice:
- Rapid increases in grinding or screeching
- Smoky smells or burning odors
- Vibration so strong the unit visibly shakes
Trends show that ignoring severe warning sounds can push repair bills over $400 or force premature opener replacement.
“A garage door’s cry for help starts with a squeak, crescendos with a grind, and ends with a breakdown—don’t let it get there.”
If in doubt, always call the Ahura Garage Doors team for expert, trustworthy help—the fix is usually quicker, safer, and more affordable than waiting for a full failure.
—
If your opener suddenly gets noisier or moves differently, your swift action could prevent a costly breakdown. Lubricate, inspect, and listen—then call for help before a minor noise turns into a major emergency.
Connectivity, Smart Features, and Wi-Fi Troubleshooting
Setting Up and Testing Wireless Connection
Getting your garage door opener connected starts with the basics: confirm the opener’s antenna is extended and positioned correctly (usually hanging straight down).
Check all mounting hardware and antenna brackets to ensure they’re tightly secured—loose parts can instantly weaken your wireless signal.
Most Wi-Fi-enabled openers follow these simple steps:
- Download the manufacturer’s app (like myQ or Aladdin Connect).
- Initiate pairing mode on the opener by pressing the dedicated “WIFI” or “Learn” button until the indicator light blinks.
- Follow app prompts to connect to your home Wi-Fi and verify connection status.
A quick tip: openers placed more than 30-40 feet from your router may need a Wi-Fi extender for reliable performance.
“Picture this: Your phone acts as your garage key—just tap, and the door opens.”
Diagnosing Wi-Fi and Smart System Failures
If your smart opener suddenly drops off-line, start with a network health check. Reboot your Wi-Fi router and ensure it’s broadcasting at 2.4 GHz, since most openers aren’t compatible with 5 GHz bands.
Next, use the manufacturer’s app diagnostic tools—often labeled as “Connection Health” or “Test Device”—to identify the cause.
Common software or settings problems include:
- Outdated app or firmware requiring an update
- Incorrect Wi-Fi password or network change
- App permissions not enabled for location or Bluetooth
For persistent issues, verify all wiring to the opener’s smart module remains tight—4 out of 5 connection failures are due to loose hardware.
“Don’t let Wi-Fi problems close the door on convenience—test, reset, and reconnect.”
Secure Remote Access and Customer Privacy
Controlling your garage from anywhere should always be safe and private. Always:
- Use strong, unique passwords on both your garage app and home Wi-Fi
- Regularly review app access logs and revoke unfamiliar devices
- Activate two-factor authentication in your app when available
At Ahura Garage Doors, we guard your privacy—our team walks you through app settings, network security, and routine privacy checks.
“If you can text from your driveway, you can secure your garage—peace of mind is just a tap away.”
A secure, smart garage door opener blends convenience and safety. By following these simple troubleshooting steps, you’re in control—keeping your garage connected, private, and running smoothly every day.
When to Call a Professional: Ensuring Safety and Reliability
When your garage door opener acts up after installation, it’s tempting to keep troubleshooting on your own.
But sometimes, calling a professional is the safest, best choice—and knowing when to make that call can prevent injury, save money, and provide true peace of mind.
Recognizing Red Flags: When DIY Stops
Watch for these clear signals DIY troubleshooting should end:
- You notice broken or stretched door springs (never adjust these yourself—serious injury is possible)
- Visible or persistent wiring problems—such as exposed wires, scorch marks, or loose connections
- The door is excessively heavy, won’t stay up when lifted by hand, or moves in a lopsided fashion (these warn of spring or structural failure)
- The opener system is repeatedly tripping the circuit breaker or causing flickering lights in your garage
- You experience recurring faults, even after resets or manual adjustments
If you feel unsure at any point, or if your troubleshooting involves tools you’re not comfortable with, it’s time to stop.
Why Trust Ahura Garage Doors in Cedar Park, TX?
Picture this: You press your remote, but the garage door just stutters.
Or, worse—there’s a loud bang and the left side drops several inches.
Situations like these call for the steady hands of a professional team.
Choosing Ahura Garage Doors means:
- Transparent pricing upfront—no surprise fees
- Fast, reliable repairs performed by friendly experts
- Every repair covered by our integrity-driven service guarantee
You’ll know what’s being fixed, why it matters, and how much it costs—before work ever begins.
Making Safety the Top Priority
Recent data shows that over 20,000 garage door injuries occur each year in the U.S.—many from failed DIY efforts.
The Ahura team is trained to spot less obvious problems: things like torsion spring fatigue, motor noise escalation, and subtle track misalignment—issues that often hide until they become dangerous or expensive.
Our technicians bring modern tools, deep experience, and a customer-first approach to every call, from electrical troubleshooting to smart system upgrades.
If your garage door still isn’t right—no matter how many steps you try—your next best step is a safe one: Contact Ahura Garage Doors for expert support and up-front answers.
Your garage door should provide security and convenience, not stress or uncertainty—so let the professionals handle the rest, while you enjoy peace of mind.
Preventive Maintenance and Customer Care Best Practices
Keeping your garage door opener running smoothly starts with a few simple steps that anyone can follow—even if you’ve never picked up a wrench.
A quick ten-minute check once a month can prevent more than 70% of emergency calls for stuck doors or noisy openers.
Fast, Essential Checks You Can Do at Home
Focus on these maintenance habits to avoid costly surprises:
- Lubricate moving parts with silicone spray every six months—this quiets squeaks and extends roller life.
- Wipe sensors with a dry cloth monthly to ensure safety beams remain clear. Even a thin layer of dust can cause sensor errors.
- Test the door’s balance by pulling the red emergency release and lifting halfway; a properly balanced door should stay in place.
- Check hardware like hinges and brackets for looseness once each season—tighten any loose bolts with a standard wrench.
“Picture this: You’re running late on a rainy Texas morning, and your garage door opens smoothly, every single time. That’s the power of a little preventive maintenance.”
When to Call the Pros—And How Ahura Helps
Certain tasks, like adjusting springs or realigning major hardware, should always be left to professionals. If your door feels unusually heavy, or you hear loud grinding or banging, schedule service right away to avoid injuries.
Ahura Garage Doors offers:
- Flexible annual maintenance plans that cover full inspections, lubrication, alignment checks, and priority scheduling.
- Warranty support—most opener brands require documented maintenance for warranty protection.
Over 85% of warranty claims we handle are approved on the first attempt, thanks to our thorough records and certified inspections.
Commitment You Can Count On
At Ahura Garage Doors, our mission is simple: give Cedar Park homeowners peace of mind and real value with every visit.
“Consistent care today means no stress tomorrow—trust your door to the team that puts customers first.”
With friendly reminders, helpful step-by-step guides, and professional service just a call away, you can be confident your garage door system will stay safe, quiet, and reliable for years to come.
Conclusion
Troubleshooting your garage door opener after installation isn’t just about fixing a glitch—it’s about taking control of your home’s safety, convenience, and peace of mind.
With a methodical approach, you can resolve most issues quickly, protecting your investment and avoiding unnecessary stress. Empowering yourself with basic troubleshooting transforms moments of frustration into opportunities for confidence and self-reliance.
Put these key actions to work right away:
- Start every check with power—confirm outlets, reset breakers, and inspect cords before moving deeper.
- Clean and align photo eyes to maintain door safety; even a little dust disrupts sensors.
- Swap out remote and keypad batteries annually for maximum reliability.
- Test door balance monthly by lifting manually—sticking or slamming calls for attention.
- Listen for unusual noises and inspect tracks and rollers; address anything new before it grows.
Here’s how you can take immediate steps for a safer, smoother garage experience:
- Perform a quick visual scan of your opener, tracks, and sensors today—catch small issues before they escalate.
- Bookmark your opener’s manual (or download it online) for easy step-by-step reference.
- Schedule a professional evaluation with Ahura Garage Doors if you spot persistent issues, safety risks, or anything that feels beyond your comfort zone.
Your garage is more than a doorway—it’s your daily safeguard. A little proactive care ensures reliability when you need it most, rain or shine.
You have the power to prevent problems and keep your garage door at its best. And when you’re ready for expert help, the Ahura Garage Doors team is always at your service—so your next emergency is nothing but a smooth click away.
“Confidence starts with a working garage door—protect yours today, and enjoy true peace of mind every time you come home.”
Garage Door Opener Installation
FAQs
Q1: What is the first step in garage door opener troubleshooting after installation?
A: Start with the basics: check the power source, including the outlet, circuit breaker, and power cord. Most garage door opener troubleshooting issues are resolved at this stage, saving time and avoiding unnecessary service calls. For safety tips, you can refer to the CPSC Garage Door Safety Guide.
Q2: How do I troubleshoot my garage door remote or keypad?
A: Battery replacement is often the solution. Perform a fresh battery swap, reprogram your remote using the opener’s “Learn” button, and check for electronic interference. These steps are essential for effective garage door opener troubleshooting at home.
Q3: Why is sensor alignment important in garage door opener troubleshooting?
A: Misaligned or dirty photo-eye sensors cause the door to reverse or stop unexpectedly. Cleaning the lenses and ensuring the sensors face each other correctly is a critical step in garage door opener troubleshooting, keeping your family safe.
Q4: When should I perform system resets or adjust opener limits?
A: If your door reverses, won’t close fully, or operates intermittently, adjusting travel limits or performing a full system reset can solve the problem. Properly following these steps ensures successful garage door opener troubleshooting without risking mechanical damage.
Q5: When is it time to call a professional for garage door opener troubleshooting?
A: Call an expert if you notice broken springs, exposed wiring, persistent faults, or if DIY troubleshooting fails. Professionals ensure safety, protect your investment, and complete garage door opener troubleshooting efficiently, preventing injuries and costly repairs.
Garage Doors
Ahura brothers services LLC
Your Trusted Garage Door Experts in Austin Texas
